Properties / Locations
Property Setup Guide
Introduction
In this section, you set up the basic settings for your property. You can add as many properties as you need. This helps with organization in the system and also on the public reservation pages. If you display units from multiple properties on the same page, they will be divided into sections by property. You can also use multiple properties for filtering results in reports and limiting access for other users by property.
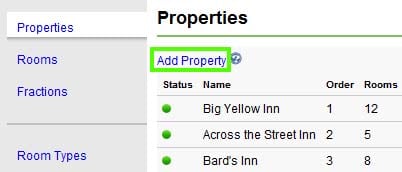
Click Add Property to create a new property, or click on an existing property name to drill down into the settings for that property.
The Property Settings Sections
The property settings have three main sections:
-
- Primary Settings
- Reservation Page Details
- Map View Settings
1. Primary Settings
Here you can set the property name and change the status to either offline or online. Changing the status to offline removes this property and all associated rooms and units from search results when guests search by availability on your website.
You can set the sort order, which controls the order in which the property appears internally as well as on public reservation pages. There is also a setting for the internal background color, which affects the display of the room or unit name on the internal availability calendar. Note that setting the color at the room or unit level will override this setting at the property level.
You can customize both the background color and the text color or click Reset to revert to the system default.
2. Reservation Page Details
These settings affect the public reservation pages, where guests search availability and make reservations. Here’s what you can customize:
- Description: This field will be shown on the public reservation page above the available rooms or units. HTML can be used in the description as needed.
- Additional Details: If you enter data into this field, it will appear in a pop-up window from a link called Additional Details in the property section of the reservation page. You can also upload files (e.g., images) and copy/paste the file codes or HTML to display images in the description or additional details box.
- Primary Photo: This is the main photo that will be displayed along with the property description. You can upload additional photos and use HTML image tags to display them in the description or more details boxes. Alternatively, you can use merge codes (e.g., {{imageID}}) for quick insertion of images.
- Slideshow: You can enable a slideshow of your additional photos. For the slideshow to work, you must have at least two photos uploaded. You can choose whether to show the slideshow and allow guests to click on the primary photo to open it. Newer themes may display the slideshow as a scrolling carousel.
- Email Template Fields: There are three fields for email templates that correspond to merge codes (e.g., {{propdetailstemplate}}, {{propdetailstemplate2}}). These merge codes will insert the property data into the emails based on the reservation property.
3. Map View Settings
This section allows you to upload a map of your property. Once the map is uploaded, you can trace rectangular areas around each reservable unit (e.g., campsites or cabins). When a guest searches for availability, available sites will show in green, and unavailable ones will show in red. This helps guests visualize the layout of your property and select a unit based on its location.
Creating Duplicates
If you have similar properties to enter, you can use the property duplication feature. Select the number of duplicates to create, and identical properties will be generated. You can then edit the duplicated properties to suit the new ones.
Deleting a Property
If you need to delete a property, you will find the Delete Property link at the bottom of the property settings page. Deleted properties are moved to the trash and can be restored if needed.
- How do I add a property to the system?
- What are other ways of thinking of the term “Properties”?
- I manage 1, 2, and 3 bedroom condos, all located in one city. How should I set up my account?
- I manage 1, 2, and 3 bedroom condos, spread between four different cities. How should I set up my account?
- Can I add more than one photo for my property?
How do I add a property to the system?
Under the Properties Tab,

click Add Property.
Complete the property information form and click Save Changes.
What are other ways of thinking of the term “Properties”?
What you consider a “property” may differ depending on how you are using the system. For example, you may manage condos in different cities, so you could enter each city as a “property” and each condo as a “room”. This really is just a way to organize your units.
I manage 1, 2, and 3 bedroom condos, all located in one city. How should I set up my account?
You should add a different property for each type of condos. This will organize your condos by type. For example, one property should be called One Bedroom Condos, and other property called Two Bedroom Condos, and the final property called Three Bedroom Condos.
Under each property type you should add the associated condo units. Add all of your two bedroom condos under the property called Two Bedroom Condos, for example.
I manage 1, 2, and 3 bedroom condos, spread between four different cities. How should I set up my account?
We recommend that you set up different properties for each city in which your condos are located. You then would add each condo as a room under the associated city. An alternate way of configuring the system would be to set up a different property for each type of condo, as explained above. How you want to set up the system really comes down to how you want to organize your units.
Can I add more than one photo for my property?
You can add as many photos as needed by uploading photos in the additional images section.