ReservationKey User Guide
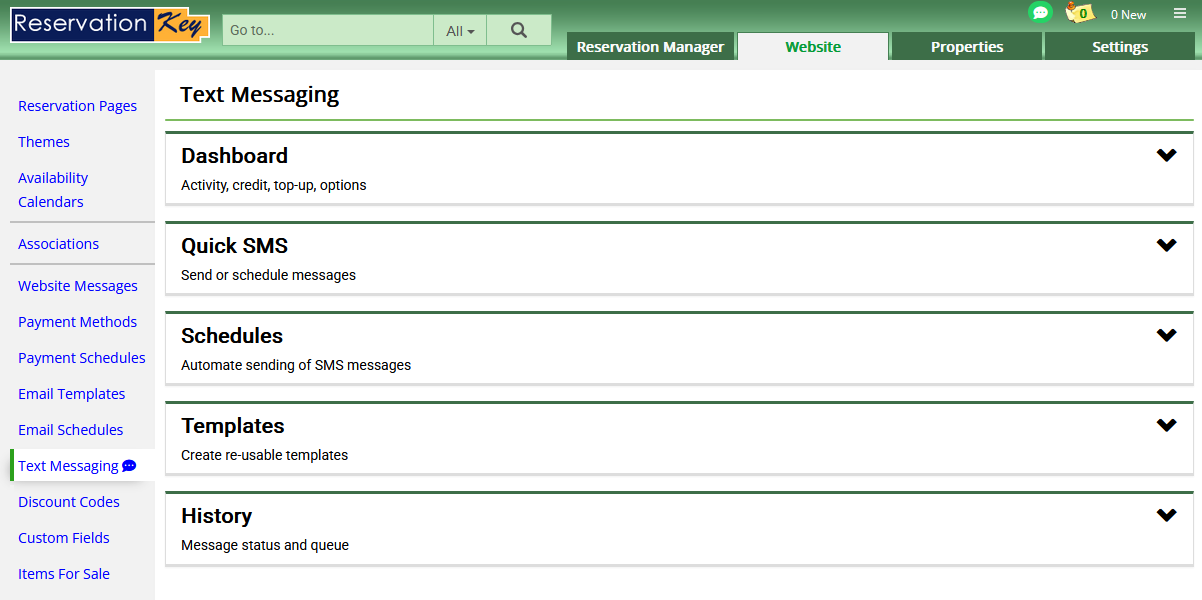
Text Messaging
1. Overview
The Text Messaging feature allows you to quickly send messages to guests, either using pre-built templates or by typing messages manually. You can engage in real-time conversations via the chat area and automate responses based on guest replies.
2. Key Features & Functions
2.1 Dashboard
- Activity Section: Displays the remaining text message credits.
- Top-Up Account: Purchase additional credits; higher amounts provide more credits per dollar spent.
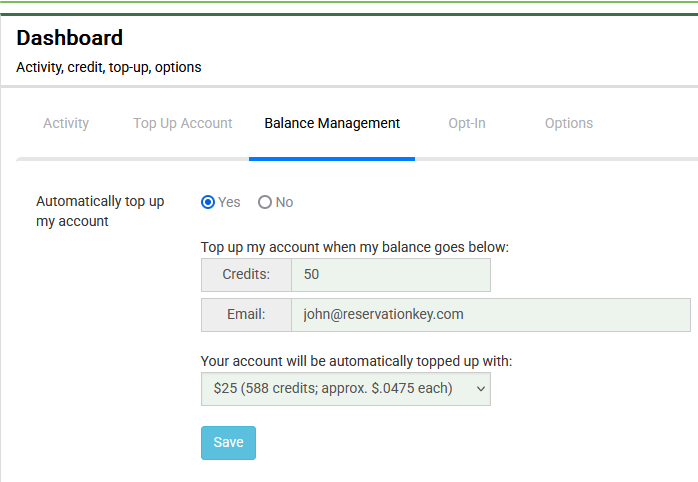
- Balance Management:
- Set automatic top-ups when credits fall below a preset amount.
- Receive email alerts if the balance gets low (if auto top-up is disabled).
- Options:
- Enable/disable text messaging.
- Set your time zone.
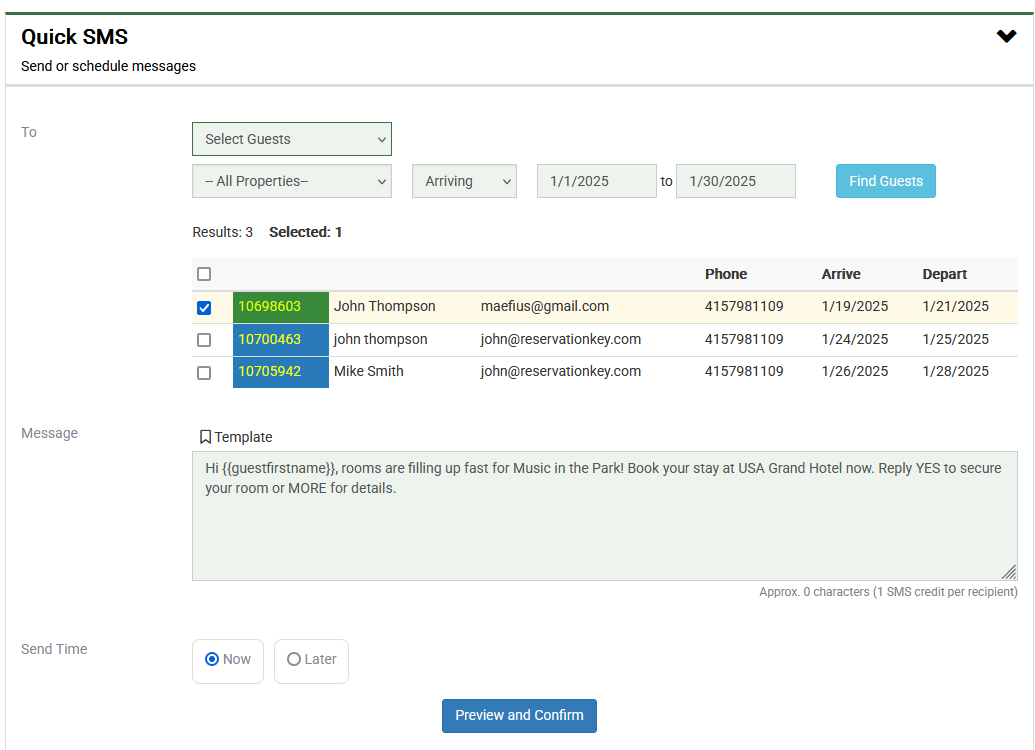
2.2 Quick SMS
- Send Messages to Guests:
- Search for guests by name, arrival date, departure date, or stay dates.
- Manually enter one or multiple phone numbers (separated by commas).
- Message Creation:
- Choose from pre-built templates or type a custom message.
- Schedule messages to send immediately or at a future date/time.
- Preview & Confirmation: Get an estimated credit usage before sending the message.
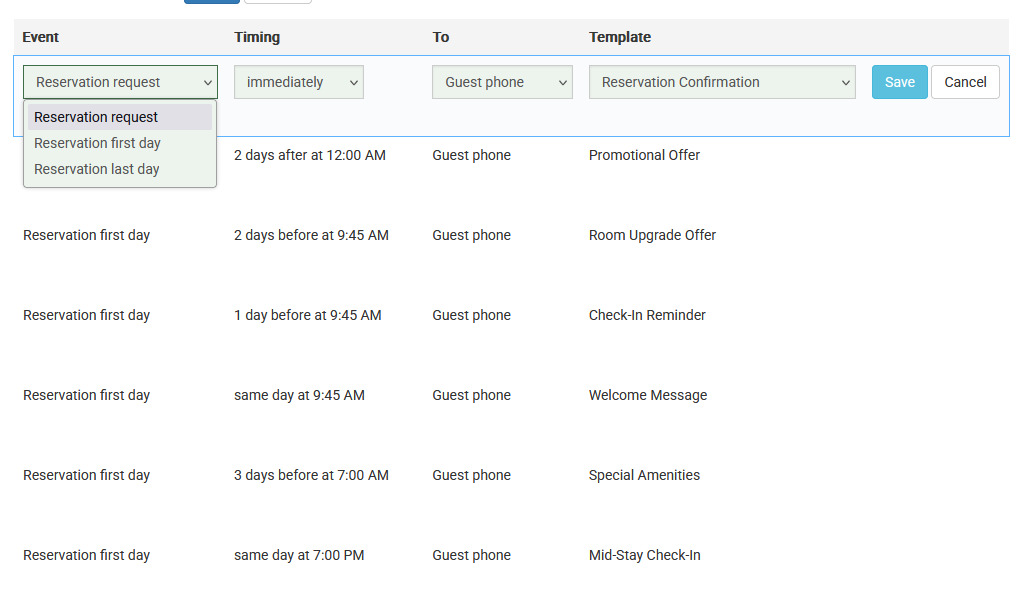
2.3 Schedules
- Manage Scheduled Messages:
- View and edit scheduled messages.
- Create new schedules with automated message triggers.
- Schedule Configuration:
- Set schedules as internal (default for manual reservations) or assign them to specific properties.
- Choose which reservation pages will use the schedule automatically.
- Triggering Events:
- Send messages based on key events such as:
- Reservation request received.
- Guest arrival.
- Guest departure.
- Define timing (e.g., send immediately or X hours/days before/after an event).
- Send messages based on key events such as:
- Recipient & Message Selection:
- Send to the guest’s phone number or enter a different number manually.
- Select a template for each event.
- Add multiple events per schedule.
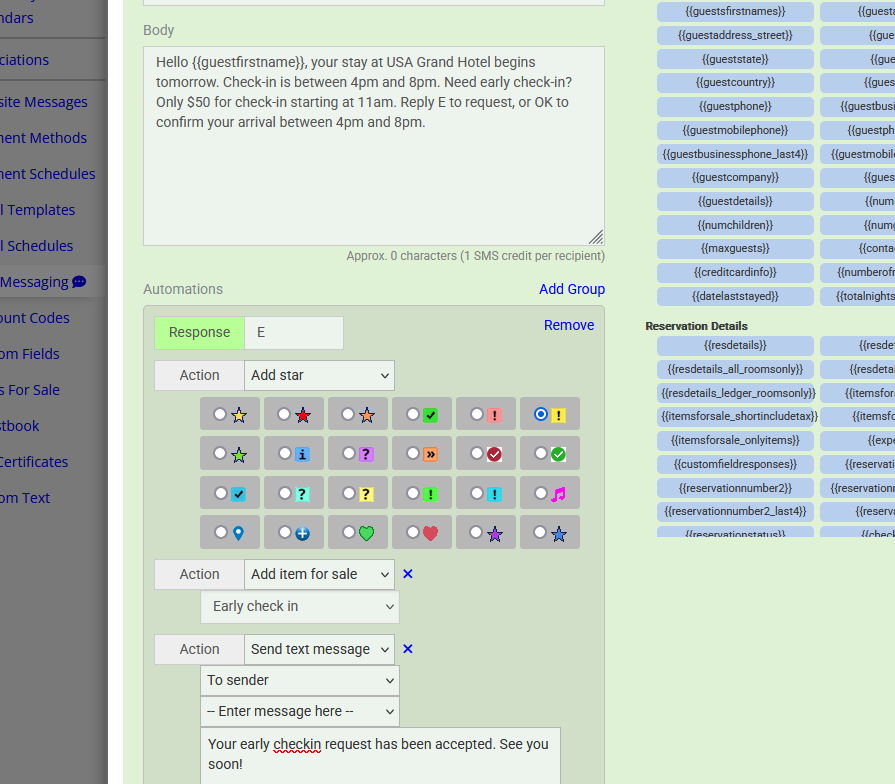
2.4 Templates
- Create & Manage Templates:
- View existing templates or create new ones.
- Enter a template name and message body.
- Merge Codes: Use dynamic fields (e.g., guest’s first name) to personalize messages.
- Automation:
- Set actions based on guest responses (e.g., replying “E” for early check-in).
- Actions can include:
- Adding items to a reservation.
- Assigning reservation tags (stars).
- Sending automated confirmation messages.
- Chained Automations: Response messages can trigger additional automated actions using other templates.
- Sample Templates: Use these examples to help you get started with automations.
2.5 History
- Track Sent & Scheduled Messages:
- View message date/time, reservation ID, sender, recipient, and full message content.
- Message Status Indicators: Sent, received, canceled, etc.
3. Additional Text Messaging Features
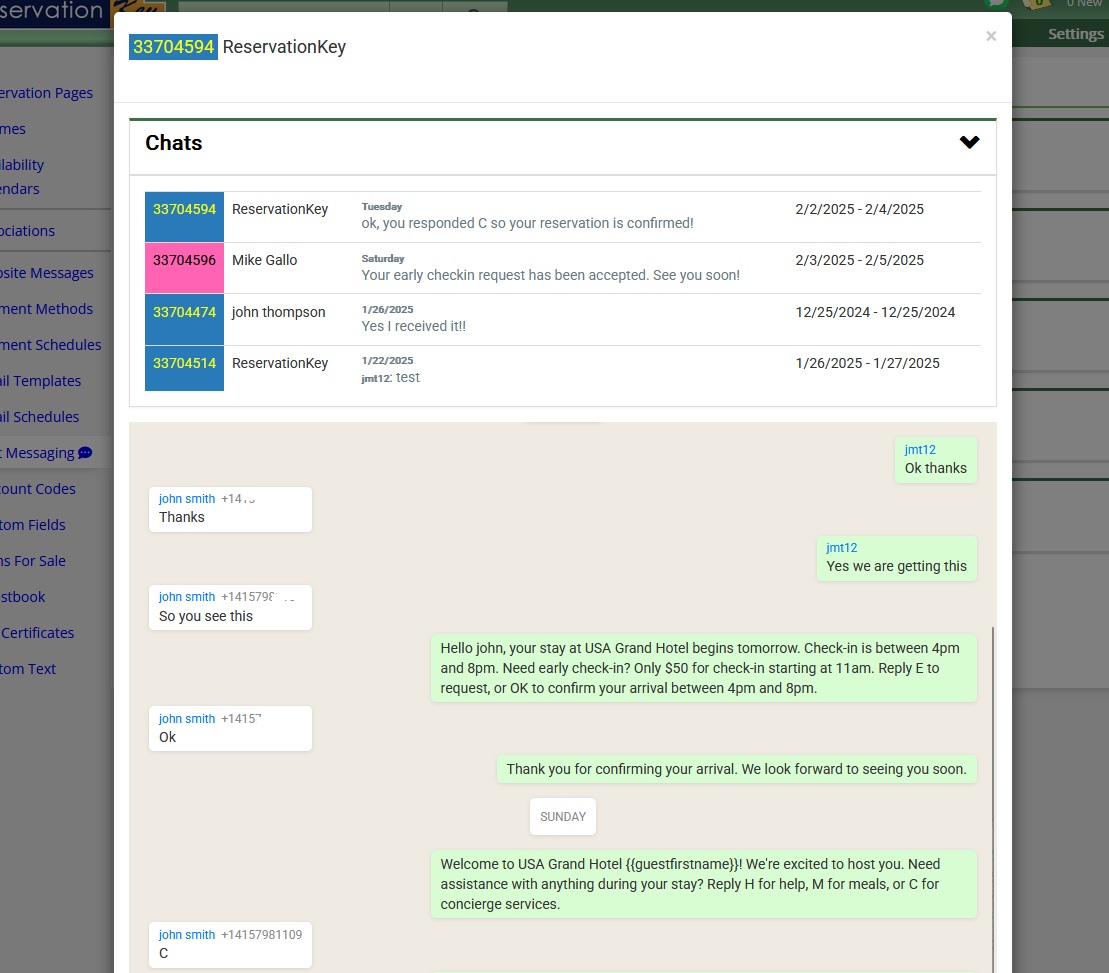
3.1 New Message Notifications
- Unread Messages Indicator:
- A message count appears on the chat icon in the header.
- Clicking the icon opens the conversation list, with unread messages at the top.
- Chat Window Access: Open from the chat icon or the Reservation Details > Correspondence section.
3.2 Viewing & Managing Scheduled Messages
- Access from Reservation Details: View queued text messages under Correspondence > History & Queue.
- Chat Window vs. History & Queue:
- Messages sent manually appear only in the chat window (not in the history queue).
- Scheduled messages are visible in the history queue until sent.
4. Step-by-Step Guides
4.1 Sending a Quick SMS
- Navigate to Messaging > Quick SMS.
- Search for a guest or manually enter a phone number.
- Select a message template or type a custom message.
- Choose Send Now or Schedule for Later.
- Click Preview & Confirm, review credits, and send.
4.2 Creating & Managing Templates
- Go to Messaging > Templates.
- Click Add Template.
- Enter a template name and compose the message.
- Use merge codes for personalization.
- (Optional) Add automations for guest replies.
- Click Save Template.
4.3 Creating a Text Messaging Schedule
- Go to Messaging > Schedules.
- Click Add Schedule and enter a name.
- Assign the schedule to specific properties or reservation pages.
- Click Add Event and set triggers.
- Choose message timing, recipient, and template.
- Click Save Schedule.
4.4 Setting Up Balance Management & Auto Top-Up
- Go to Messaging > Dashboard.
- Locate Balance Management.
- Set auto top-up amount and trigger threshold.
- Enable email alerts if auto top-up is disabled.
- Click Save Settings.
4.5 Manually Responding to Guest Messages
- Go to Messaging > Chat.
- Select a conversation from the list.
- Type your response in the message box.
- Click Send.
4.6 Setting Up Automated Responses
- Go to Messaging > Templates.
- Click Add Template.
- Compose a message and use merge codes if needed.
- Set automation rules based on guest replies (e.g., reply “E” for early check-in).
- Click Save Template.
4.7 Assigning Different Schedules to Properties
- Go to Messaging > Schedules.
- Click Edit on an existing schedule or create a new one.
- Assign the schedule to a specific property or reservation page.
- Click Save Schedule.
4.8 Using Merge Codes for Personalized Messages
- Go to Messaging > Templates.
- Click Add Template or edit an existing one.
- Insert merge codes into the message body (e.g.,
{{GuestFirstName}}). - Click Save Template.
5. Best Practices & Tips
- ✔ Use templates to save time and ensure consistent messaging.
- ✔ Enable automations to streamline guest interactions.
- ✔ Regularly check the history section to review sent messages.
6. Pricing
Price is per message. Credits can be purchased from within the text messaging dashboard section, top-up my account. The most current pricing will be shown in the dashboard. As of 2025 the pricing is as follows:
| Top Up Amount | Number of SMS | Price per SMS |
|---|---|---|
| $25 | 588 SMS | $0.0475 |
| $50 | 1,176 SMS | $0.0425 |
| $100 | 2,353 SMS | $0.0425 |
| $150 | 4,000 SMS | $0.0375 |
| $200 | 5,333 SMS | $0.0375 |
| $250 | 7,353 SMS | $0.034 |
| $300 | 8,824 SMS | $0.034 |
| $350 | 10,294 SMS | $0.034 |
| $400 | 12,903 SMS | $0.031 |
| $450 | 14,516 SMS | $0.031 |
7. Troubleshooting & FAQs
Q: Why can’t I send messages?
A: Check that text messaging is enabled in the Options section. Ensure you have enough message credits.
Q: How do I know if a message was delivered?
A: In the History section, check the message status (e.g., sent, received, or failed).
Q: Can I set messages to send automatically for all reservations?
A: Yes, set up a schedule and assign it to specific properties or reservation pages.